Markdown and Visual Studio Code
Working with Markdown files in Visual Studio Code is simple, straightforward, and fun. Besides VS Code's basic editing, there are a several Markdown-specific features that help you be more productive.
Note: To help get you started with editing Markdown files, you can use the Doc Writer profile template to install useful extensions (spell checker, Markdown linter) and configure appropriate setting values.
Editing Markdown
Document outline
The Outline view is a separate section in the bottom of the File Explorer. When expanded, it shows the symbol tree of the currently active editor. For Markdown files, the symbol tree is the Markdown file's header hierarchy.
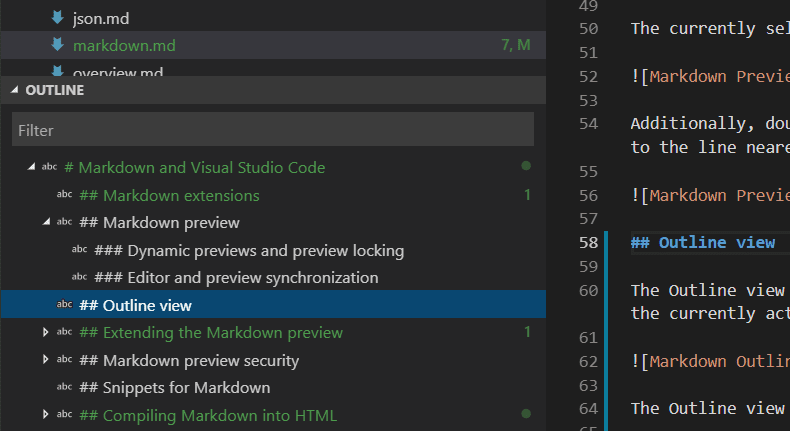
The Outline view is a great way to review your document's header structure and outline.
Snippets for Markdown
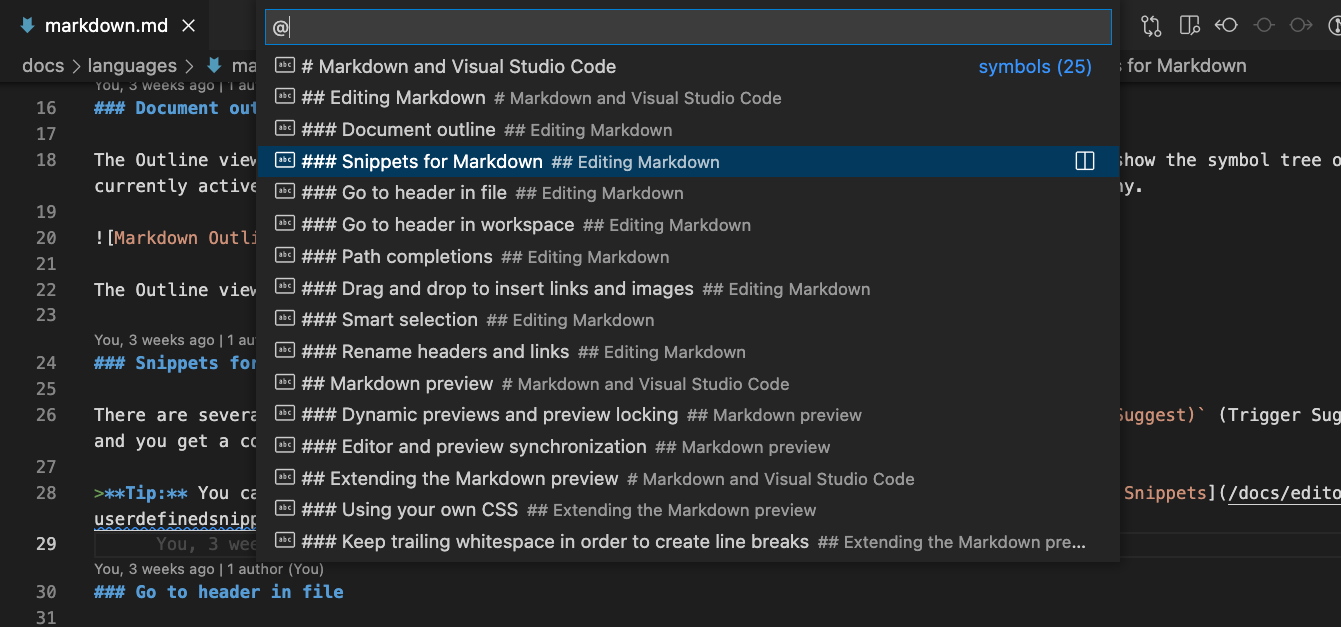
VS Code includes some useful snippets that can speed up writing Markdown. This includes snippets for code blocks, images, and more. Press Ctrl+Space (Trigger Suggest) while editing to see a list of suggested Markdown snippets. You can also use the dedicated snippet picker by selecting Insert Snippet in the Command Palette.
Tip: You can add in your own User Defined Snippets for Markdown. Take a look at User Defined Snippets to find out how.
Go to header in file
Use kb(workbench.action.gotoSymbol) to quickly jump to a header in the current file.
You can browse through all headers in the file or start typing a header name to find just the one you are after. Once you've found the header you what, press Enter to move your cursor to it. Press Esc to cancel jumping to the header.
Go to header in workspace
Use kb(workbench.action.showAllSymbols) to search through headers across all Markdown files in the current workspace.

Start typing a header name to filter down the list and find the header you are after.
Path completions
Path completions help with create links to files and images. These paths are shown automatically by IntelliSense as you type the path of an image or link, and can also be manually requested by using Ctrl+Space.
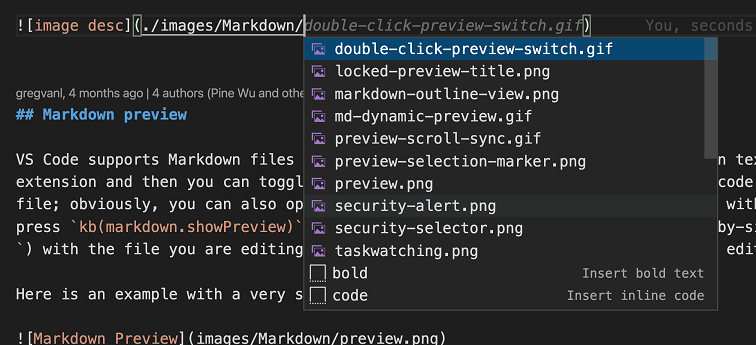
Paths starting with / are resolved relative to the current workspace root, while paths staring with ./ or without any prefix are resolved relative to the current file. Path suggestions are automatically shown when you type / or can be manually invoked by using Ctrl+Space.
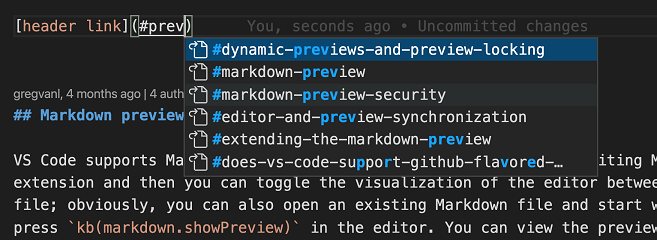
Path IntelliSense can also help you link to headers within the current file or within another Markdown file. Start the path with # to see completions for all the headers in the file (depending on your settings, you might need to use Ctrl+Space to see these):
You can disable path IntelliSense with "markdown.suggest.paths.enabled": false.
Creating links to a header in another file
Need to link to a header in another Markdown document but don't remember or want to type out the full file path? Try using workspace header completions! To start, just type ## in a Markdown link to see a list of all Markdown headers from the current workspace:
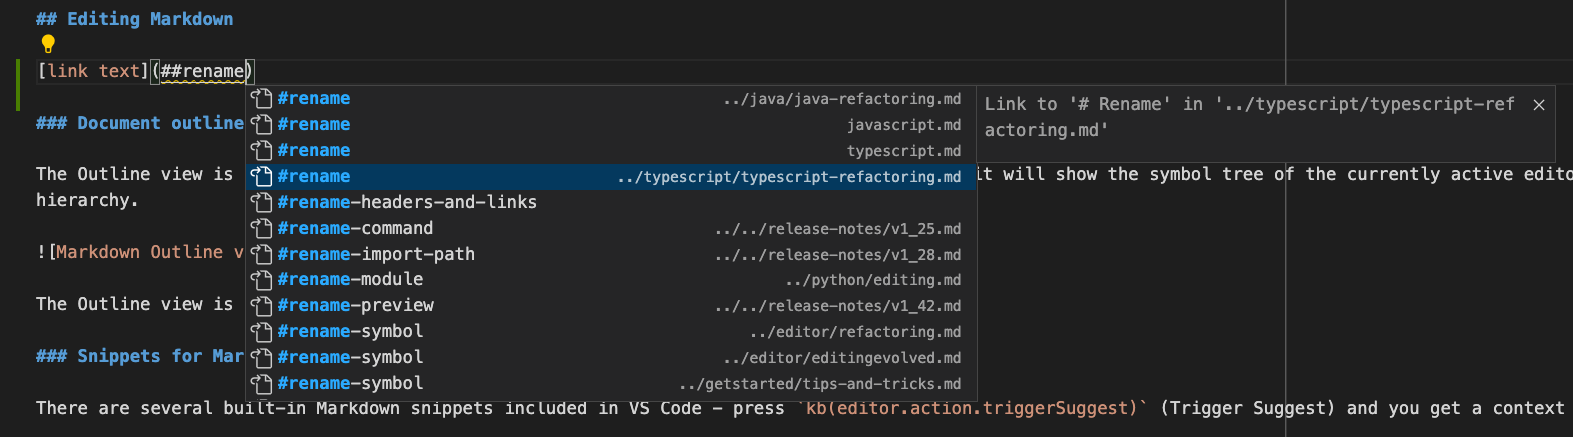
Accept one of these completions to insert the full link to that header, even if it's in another file:

You can configure if/when workspace header completions show with the markdown.suggest.paths.includeWorkspaceHeaderCompletions setting. Valid setting values are:
onDoubleHash(the default)—Show workspace header completions only after you type##.onSingleOrDoubleHash—Show workspace header completions after you type#or##.never—Never show workspace header completions.
Keep in mind that finding all headers in the current workspace can be expensive, so there might be a slight delay the first time they are requested, especially for workspaces with lots of Markdown files.
Inserting images and links to files
In addition to path completion, VS Code also supports a few other ways to insert images and file links into your Markdown documents:
You can Drag and drop a file from VS Code's Explorer or from your operating system into a Markdown editor. Start by dragging a file from VS Code's Explorer over your Markdown code and then hold down Shift to start dropping it into the file. The preview cursor shows where it will be inserted when you drop it.

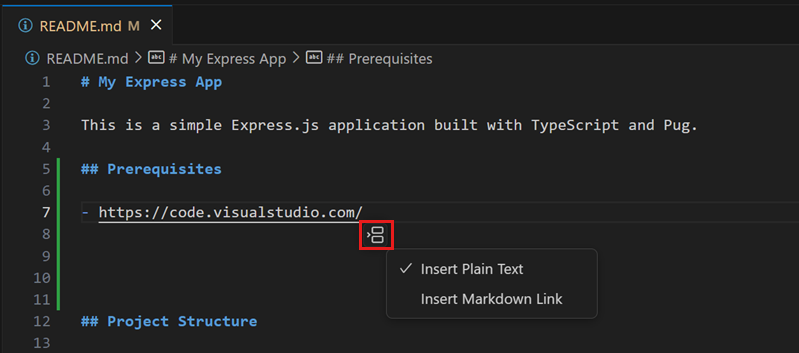
If you prefer using the keyboard, you can also Copy and paste a file or image data into a Markdown editor. When you paste a file, a link to a file, or a URL, you can choose to insert a Markdown link or to include the link as plain text.
Or you can use the Markdown: Insert Image from Workspace command to insert images and Markdown: Insert Link to File in Workspace to insert file links.
Inserted images use Markdown image syntax . Links insert a normal Markdown link [](path/to/file.md).
By default VS Code automatically copies dropped or pasted images outside of the workspace into your workspace. The markdown.copyFiles.destination setting controls where the new image file should be created. This setting maps globs that match on the current Markdown document to image destinations. The image destinations can also use some simple variables. See the markdown.copyFiles.destination setting description for information about the available variables.
For example, if you want every Markdown file under /docs in your workspace to put new media files into an images directory specific to the current file, you can write:
"markdown.copyFiles.destination": {
  "/docs/**/*": "images/${documentBaseName}/"
}
Now when a new file is pasted in /docs/api/readme.md, the image file is created at /docs/api/images/readme/image.png.
You can even use simple regular expressions to transform variables in a similar way to snippets. For example, this transform uses only the first letter of the document file name when creating the media file:
"markdown.copyFiles.destination": {
  "/docs/**/*": "images/${documentBaseName/(.).*/$1/}/"
}
When a new file is pasted into /docs/api/readme.md, the image is now created under /docs/api/images/r/image.png.
Smart selection�
Smart selection lets you quickly expand and shrink selection in Markdown documents. This can be used to quickly select entire block elements (such as code blocks or tables) and to select the entire contents of a header section in the Markdown file.
Smart selection uses the following commands:
- Expand:
kb(editor.action.smartSelect.expand) - Shrink:
kb(editor.action.smartSelect.shrink)
Selection applies to the following, and follows a traditional hierarchical pattern:
- Headers
- Lists
- Block quotes
- Fenced code blocks
- Html code blocks
- Paragraphs
Link validation
Link validation checks local links in your Markdown code to make sure they are valid. This can catch common mistakes, such linking to a header that was renamed or to a file that no longer exists on disk.

Link validation is off by default. To enable it, set "markdown.validate.enabled": true. VS Code then analyzes Markdown links to headers, images, and other local files. Invalid links are reported as either warnings or errors. All link validation happens locally and there is no checking of external http(s) links.
There are a few settings you can use to customize link validation:
markdown.validate.fileLinks.enabled- Enable/disable validation of links to local files:[link](/path/to/file.md)markdown.validate.fragmentLinks.enabled- Enable/disable validation of links to headers in the current file:[link](#some-header)markdown.validate.fileLinks.markdownFragmentLinks- Enabled/disable validation of links to headers in the other markdown file:[link](other-file.md#some-header)markdown.validate.referenceLinks.enabled- Enable/disable validation of reference links:[link][ref].markdown.validate.ignoredLinks- A list of link globs that skip validation. This is useful if you link to files that don't exist on disk but do exist once the Markdown is published.
Find All References to headers and links
Use the Find All References (kb(references-view.findReferences)) command to find all locations in the current workspace where a Markdown header or link is referenced:
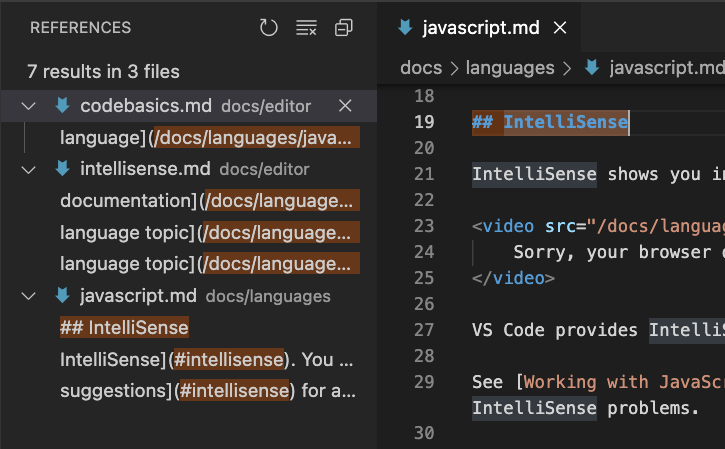
Find All References is supported for:
- Headers:
# My Header. Shows all links to#my-header. - External links:
[text](http://example.com). Shows all links tohttp://example.com. - Internal links:
[text](./path/to/file.md). Shows all links to./path/to/file.md - Fragments in links:
[text](./path/to/file.md#my-header). Shows all links to#my-headerin./path/to/file.md
Rename headers and links
Tired of accidentally breaking links when you change a Markdown header? Try using Rename Symbol (kb(editor.action.rename)) instead. After you type the new header name and press Enter, VS Code updates the header and automatically updates all links to that header:
You can also use kb(editor.action.rename) on:
- Headers:
# My Header. This updates all links to#my-header. - External links:
[text](http://example.com/page). This updates all places that linked tohttp://example.com/page - Internal links:
[text](./path/to/file.md). This renames the file./path/to/file.mdand also updates all links to it. - Fragments in links:
[text](./path/to/file.md#my-header). This renames the header in./path/to/file.mdand also updates all links to it.
Automatic link updates on file move or rename
With automatic Markdown link updating, VS Code will automatically update Markdown links whenever a linked to file is moved or renamed. You can enable this feature with the markdown.updateLinksOnFileMove.enabled setting. Valid setting values are:
never(the default) — Don't try to update links automatically.prompt— Confirm before updating links.always— Update links automatically without confirmation.
Automatic link updating detects renames of Markdown files, images, and directories. You can enable it for additional file types with markdown.updateLinksOnFileMove.include.
Markdown preview
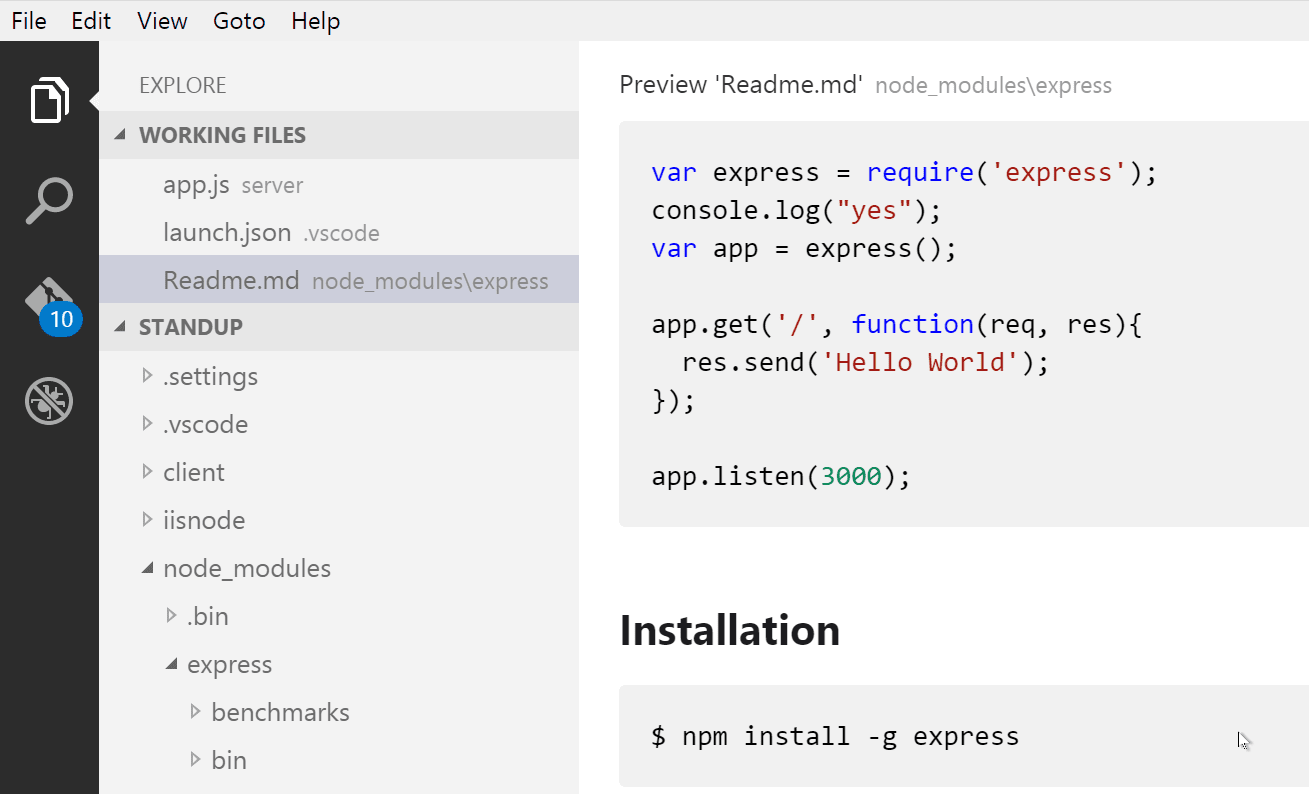
VS Code supports Markdown files out of the box. You just start writing Markdown text, save the file with the .md extension and then you can toggle the visualization of the editor between the code and the preview of the Markdown file; obviously, you can also open an existing Markdown file and start working with it. To switch between views, press Ctrl+Shift+V in the editor. You can view the preview side-by-side (Ctrl+K V) with the file you are editing and see changes reflected in real-time as you edit.
Here is an example with a simple file.
Tip: You can also right-click on the editor Tab and select Open Preview (
Ctrl+Shift+V) or use the Command Palette (Ctrl+Shift+P) to run the Markdown: Open Preview to the Side command (Ctrl+K V).
Dynamic previews and preview locking
By default, Markdown previews automatically update to preview the currently active Markdown file:
You can lock a Markdown preview using the Markdown: Toggle Preview Locking command to keep it locked to its current Markdown document. Locked previews are indicated by [Preview] in the title:

Note: The Markdown: Toggle Preview Locking command is available only if Markdown preview is the active Tab.
Editor and preview synchronization
VS Code automatically synchronizes the Markdown editor and the preview panes. Scroll the Markdown preview and the editor is scrolled to match the preview's viewport. Scroll the Markdown editor and the preview is scrolled to match its viewport:
You can disable scroll synchronization using the markdown.preview.scrollPreviewWithEditor and markdown.preview.scrollEditorWithPreview settings.
The currently selected line in the editor is indicated in the Markdown preview by a light gray bar in the left margin:

Additionally, double clicking an element in the Markdown preview will automatically open the editor for the file and scroll to the line nearest the clicked element.
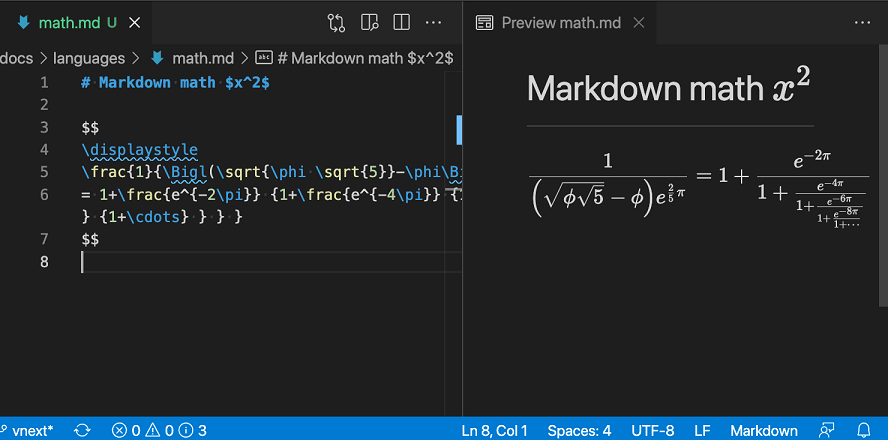
Math formula rendering
VS Code's built-in Markdown preview renders math equations using KaTeX.
Inline math equations are wrapped in single dollar signs:
Inline math: $x^2$
You can create a math equation block with double dollar signs:
Math block:

$$
\displaystyle
\left( \sum_{k=1}^n a_k b_k \right)^2
\leq
\left( \sum_{k=1}^n a_k^2 \right)
\left( \sum_{k=1}^n b_k^2 \right)
$$
You can set "markdown.math.enabled": false to disable the rendering of math formulas in Markdown files.
Extending the Markdown preview
Extensions can contribute custom styles and scripts to the Markdown preview to change its appearance and add new functionality. Here's a set of example extensions that customize the preview:
Using your own CSS
You can also use your own CSS in the Markdown preview with the "markdown.styles": [] setting. This lists URLs for style sheets to load in the Markdown preview. These stylesheets can either be https URLs, or relative paths to local files in the current workspace.
For example, to load a stylesheet called Style.css at the root of your current workspace, use File > Preferences > Settings to bring up the workspace settings.json file and make this update:
// Place your settings in this file to overwrite default and user settings.
{
  "markdown.styles": ["Style.css"]
}
Keep trailing whitespace in order to create line breaks
To create hard line breaks, Markdown requires two or more spaces at the end of a line. Depending on your user or workspace settings, VS Code might be configured to remove trailing whitespace. In order to keep trailing whitespace in Markdown files only, you can add these lines to your settings.json:
{
  "[markdown]": {
    "files.trimTrailingWhitespace": false
  }
}
Markdown preview security
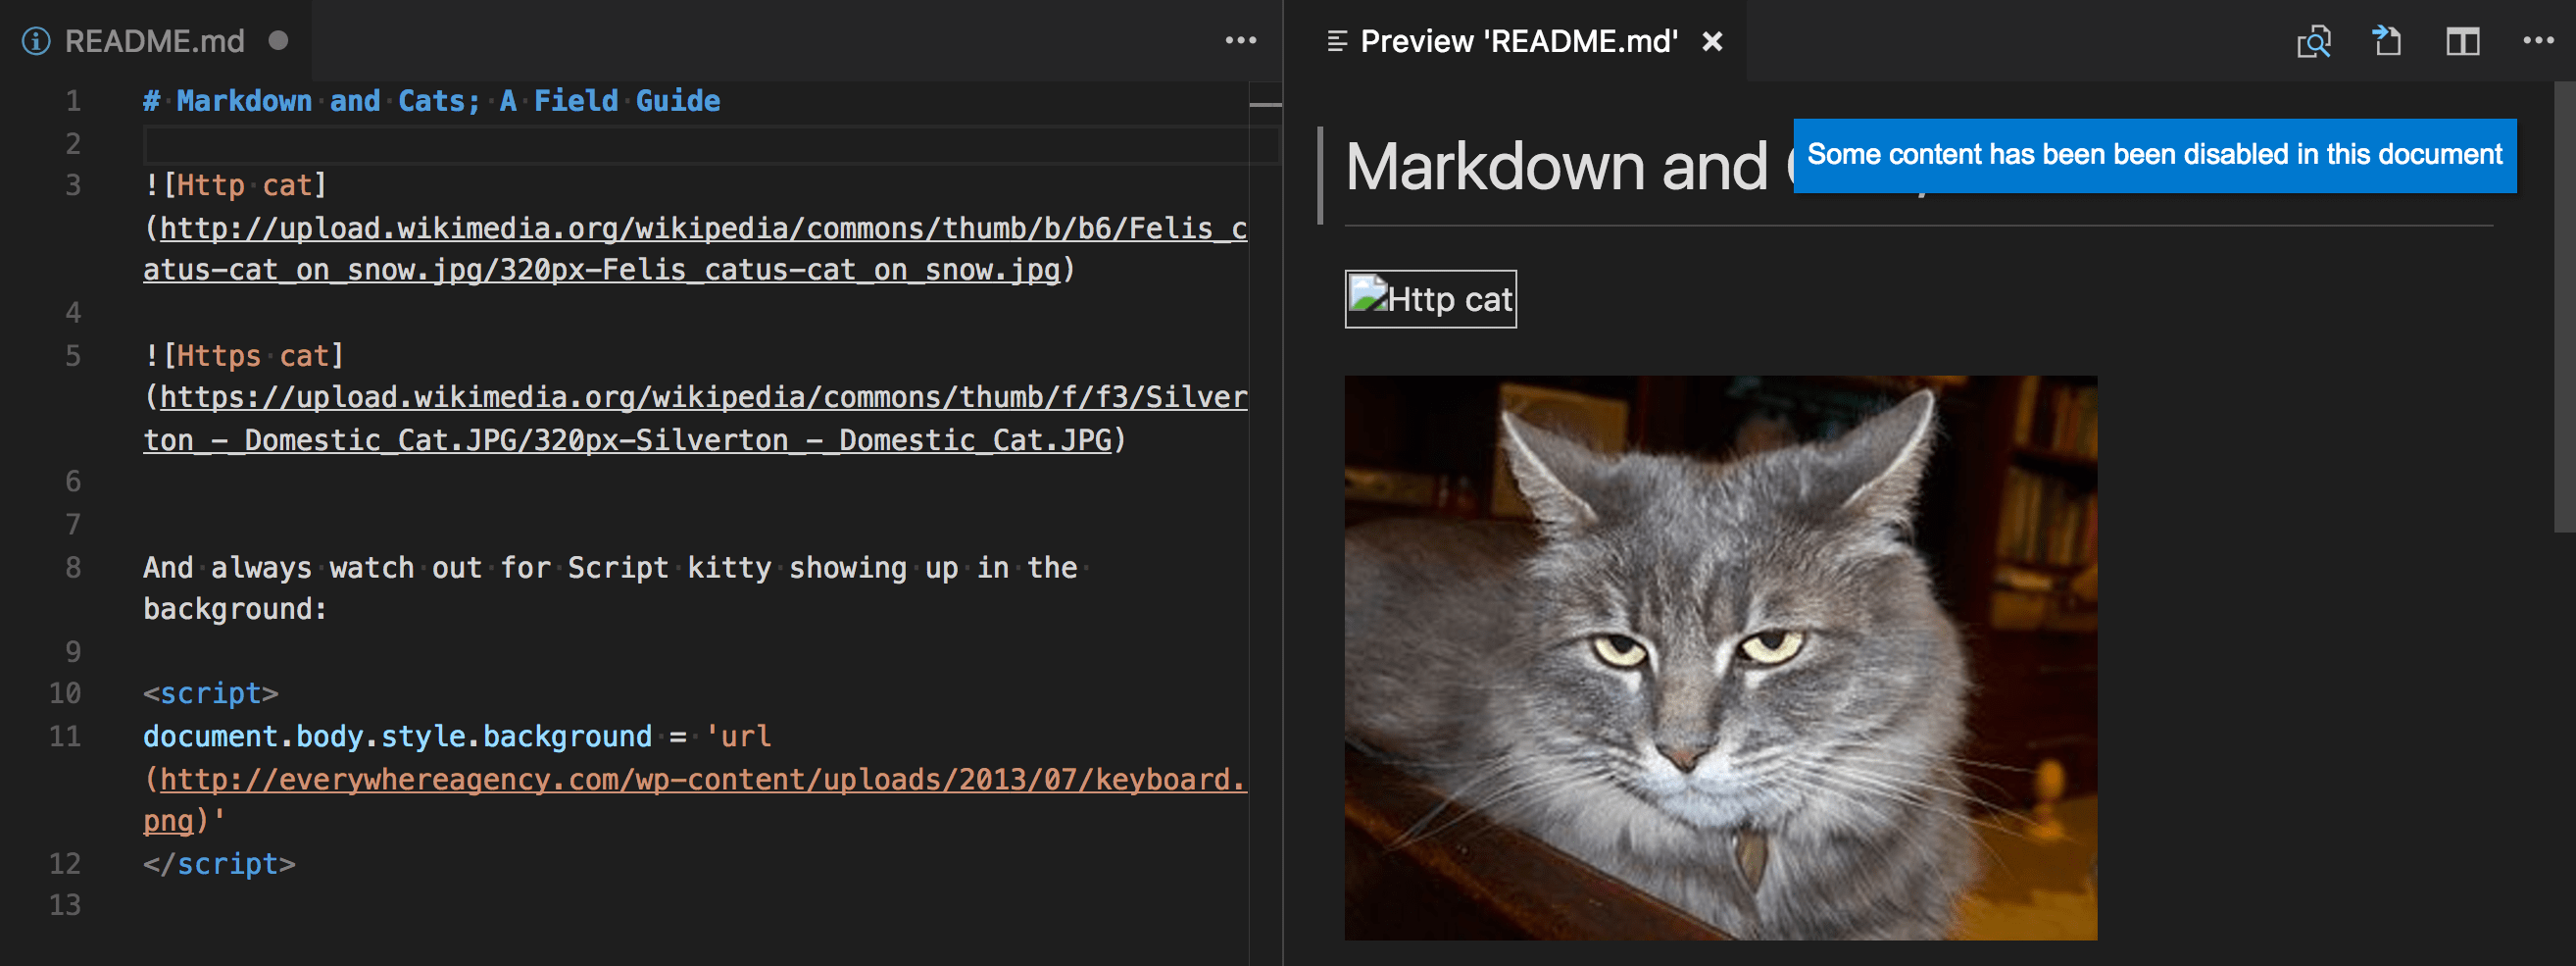
For security reasons, VS Code restricts the content displayed in the Markdown preview. This includes disabling script execution and only allowing resources to be loaded over https.
When the Markdown preview blocks content on a page, an alert popup is shown in the top right corner of the preview window:
You can change what content is allowed in the Markdown preview by clicking on this popup or running the Markdown: Change preview security settings command in any Markdown file:

The Markdown preview security settings apply to all files in the workspace.
Here are the details about each of these security levels:
Strict
This is the default setting. Only loads trusted content and disables script execution. Blocks http images.
We recommended that you keep Strict security enabled, unless you have a very good reason to change it AND you trust all Markdown files in the workspace.
Allow insecure content
Keeps scripts disabled but allows content to be loaded over http.
Disable
Disables additional security in the preview window. This allows script execution and also allows content to be loaded over http.
Doc Writer profile template
Profiles let you quickly switch your extensions, settings, and UI layout depending on your current project or task. To help you get started with editing Markdown, you can use the Doc Writer profile template, which is a curated profile with useful extensions and settings. You can use a profile template as is or use it as a starting point to customize further for your own workflows.
You select a profile template through the Profiles > Create Profile... dropdown:
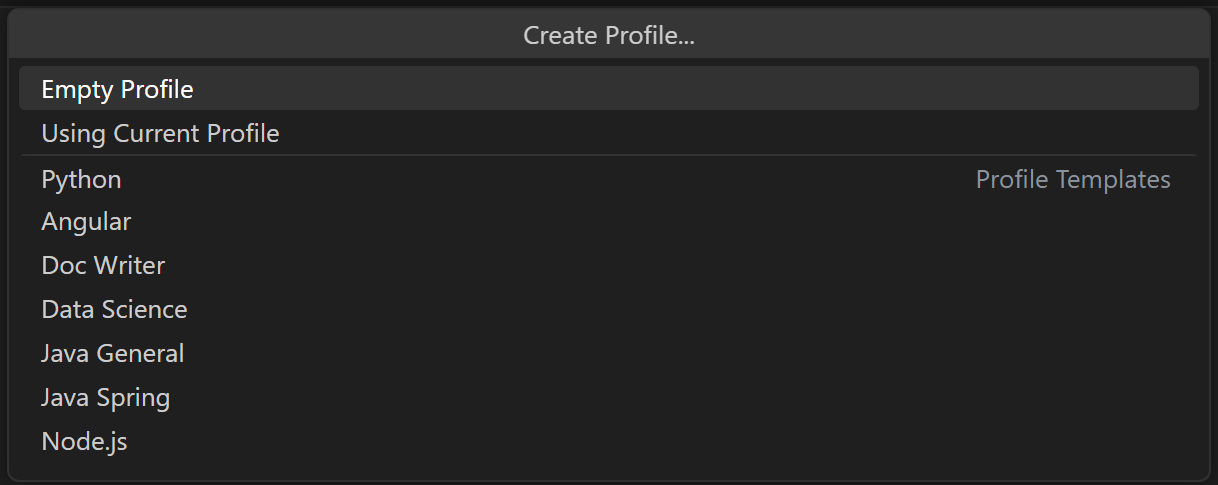
Once you select a profile template, you can review the settings and extensions, and remove individual items if you don't want to include them in your new Profile. After creating the new profile based on a template, changes made to settings, extensions, or UI are persisted in your profile.
Markdown extensions
In addition to the functionality VS Code provides out of the box, you can install an extension for greater functionality.
Tip: Select an extension tile to read the description and reviews to decide which extension is best for you. See more in the Marketplace.
Next steps
Read on to find out about:
- CSS, SCSS, and Less - Want to edit your CSS? VS Code has great support for CSS, SCSS, and Less editing.
Common questions
Is there spell checking?
Not installed with VS Code but there are spell checking extensions. Check the VS Code Marketplace to look for useful extensions to help with your workflow.
Does VS Code support GitHub Flavored Markdown?
No, VS Code targets the CommonMark Markdown specification using the markdown-it library. GitHub is moving toward the CommonMark specification, which you can read about in this update.