Getting Started with C# in VS Code
This getting started guide introduces you to C# and .NET for Visual Studio Code through the following tasks:
- Installing and setting up your VS Code environment for C#.
- Writing and running a simple "Hello World" application using C#.
- Introduce you to other learning resources for C# in VS Code.
Keep in mind, that this guide won't teach you C#. Instead, it teaches you how to get set up for C# development in VS Code. If you're looking for resources to learn C#, check out our C# curriculum.
Learn C# CurriculumNecessary tools
- Visual Studio Code
- C# Dev Kit extension
- For .NET Development, the .NET SDK
Install
Installing VS Code and extensions
- If you haven't already done so, install VS Code.
- Next, install C# Dev Kit from the Visual Studio Marketplace. For additional details on installing extensions, read Extension Marketplace. The C# extension is called C# Dev Kit and it's published by Microsoft.
Note: C# Dev Kit supports cloud native development. To do cross-platform mobile and desktop development, you can use C# Dev Kit with the .NET MAUI extension. Learn how to get set up with .NET MAUI in VS Code.
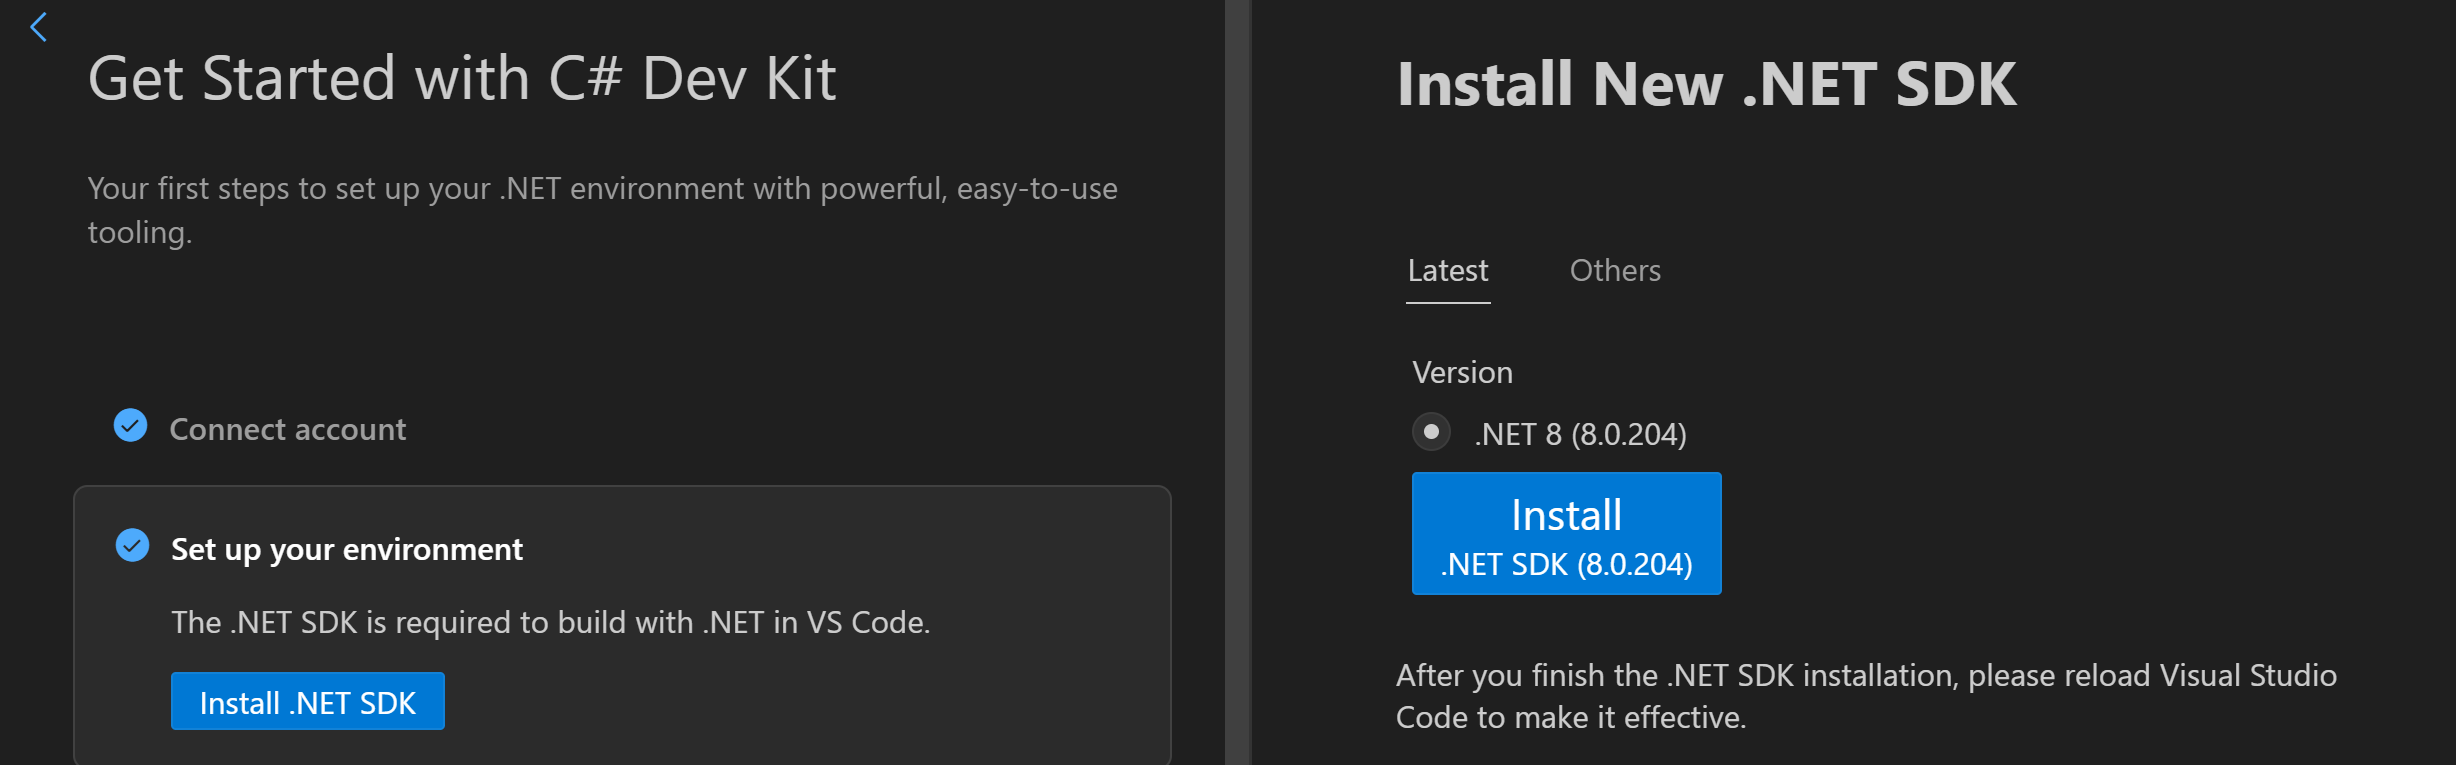
Upon installation, C# Dev Kit launches an extension walkthrough. You can follow the steps of this walkthrough to learn more about the features of the C# extension. You can also use this walkthrough to install the latest .NET SDK. Reopen the walkthrough at any time by opening the Command Palette (kb(workbench.action.showCommands)) and selecting Welcome: Open Walkthrough. Here, select Get Started with C# Dev Kit.
Note: You are required to sign in to a Visual Studio subscription to use C# Dev Kit. Check out the Signing in to C# Dev Kit documentation to learn more.
In the walkthrough, select Set up your environment and select Install .NET SDK. This will open a window next to the walkthrough with a button to install the latest version of the .NET SDK. Select the Install button, which will trigger a download and an install of the .NET SDK. Follow the on-screen instructions to complete this process.
Create a Hello World app
To get started, go to the Explorer view and select Create .NET Project. Alternatively, you can bring up the Command Palette using kb(workbench.action.showCommands) and then type ".NET" and find and select the .NET: New Project command.
- After selecting the command, you'll need to choose the project template. Choose Console app.
- To run your app, select Run > Run without Debugging in the upper menu, or use the
kb(workbench.action.debug.run)keyboard shortcut. To learn more about debugging your C# project, read the debugging documentation.
Learn more
Explore all the features the C# extension has to offer by looking for .NET in the Command Palette. For more information on these features, refer to the other documentation pages.
For learning materials on C# and .NET, check out the following resources:
Join the community
Find community resources and connect with user groups.
.NET developer community - Meet with like-minded developers